
Christmas Lighting Made Easy
Essential Supplies
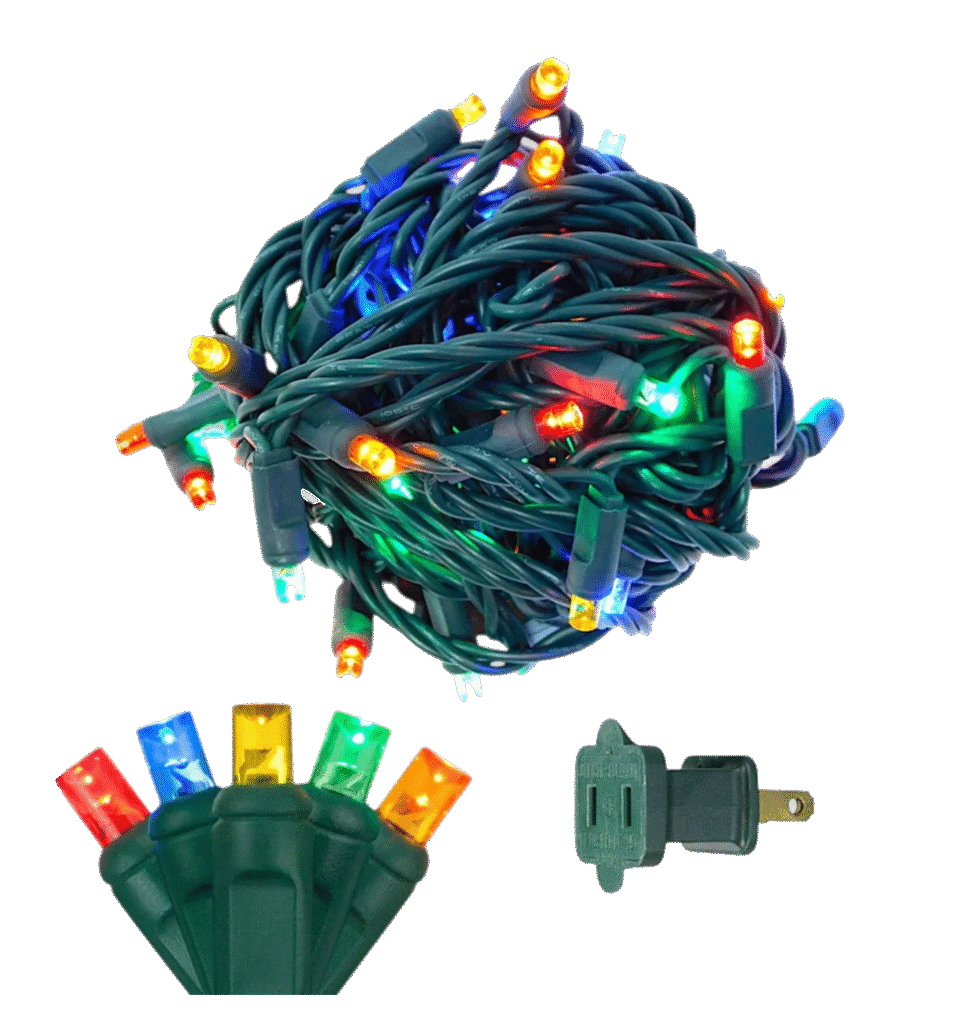
Supplies Used In Video
How to Replace Fuses in Mini String Lights: A Complete Guide for Safe and Efficient Repairs
Mini string lights are a popular choice for decorating homes, yards, and trees during holidays and special events. They add charm and warmth, but like all electrical items, they can sometimes stop working. One common cause? A blown fuse. Knowing how to replace it can save you time and money, plus keep your lights shining bright.
This guide walks you through understanding mini string light design, the importance of fuses, and step-by-step instructions for quick, safe repairs. Let’s get started.
Understanding the Design and Construction of Mini String Lights
Overview of Mini Light Design
Mini string lights typically come with small bulbs spaced either 4 or 6 inches apart. These wires run along a thin plastic casing, with the bulbs attached at intervals. They are designed to be easy to hang on trees, fences, or walls. Inside, they contain small electrical components that keep everything working smoothly.
Role of Fuses in Mini Lights
The fuse acts like a safety valve. Its job is to protect the wiring and bulbs if too much current flows through the circuit. When a power surge or short circuit happens, the fuse blows—preventing damage or even fire. You’ll usually find the fuse inside a small compartment on the light string, near the plug or along the wiring.
What is Full Wave Rectification?
Mini lights, especially those with LED bulbs, use a device called a rectifier. This component changes AC power from your outlet into a form that LEDs can handle better, reducing flickering. However, rectifiers can wear out or fail over time, leading to flickering or lights going out altogether. Knowing this helps in troubleshooting—if replacing the fuse doesn’t work, the rectifier might be the culprit.
Common Failure Points
Most electrical issues with mini string lights come from blown fuses. But rectifiers and wiring connections can also cause problems. Physical damage—like squirrels chewing wires or stapling too hard—can break connections or damage components. If your lights flicker or don’t turn on, it’s worth checking both the fuse and other parts.
Tools and Supplies Needed for Fuse Replacement
Essential Tools
- Wreath wire — a sturdy piece of wire used for pulling or pushing small parts
- Tweezers or small screwdrivers — helpful for removing and installing fuses
- Replacement fuses — always have spare fuses that match your light’s specifications
Recommended Materials
- Properly rated fuses compatible with your mini lights
- Protective gear (if you prefer safety gloves)
- Storage container for spare parts
Step-by-Step Guide to Replacing Mini Light Fuses
Accessing the Fuse Compartment
First, locate the fuse inside the male plug. Usually, it’s in a small, removable holder on the male plug. Carefully open this compartment without yanking or damaging the wiring—gentle is key.
Removing the Old Fuse
Using a piece of wreath wire or tweezers, gently hook onto the fuse. Wiggle it back and forth. Often, the fuse sits tightly but can be pried out without breaking. If it’s stuck or difficult, don’t force it—try a different angle or tool.
Installing the New Fuse
Drop the new fuse into the holder, making sure it’s sitting flat and making contact. Use the wreath wire to gently push or lock it into place. Once secure, close the fuse compartment securely.
Testing the Lights
Plug the string back in and switch it on. If the lights turn on, congratulations! If not, double-check the fuse placement—sometimes a fuse can look fine but isn’t making good contact. If they still don’t work after replacing the fuse, the rectifier or wiring might be faulty.
Preventative Maintenance and Tips for Longevity
Handling and Installing Mini Lights
Avoid stapling or pulling on the wiring too hard. A gentle touch reduces internal damage. Keep squirrels and pets away from outdoor lights to prevent chew damage.
Regular Inspection Routine
Every season, check the fuse and wiring. Look for corrosion, burn marks, or loose connections. Replacing worn-out fuses early can prevent bigger problems later.
Storage Tips
After the holidays, store mini lights carefully in a cool, dry place. Keep extra fuses handy—store them with your holiday decorations so you’re ready next year.
Conclusion
Replacing a fuse in your mini string lights is a simple task that can restore your holiday decor quickly. Always handle components gently, keep spare parts nearby, and perform routine checks for damage. Proper maintenance not only extends the life of your lights but also keeps your holiday festive and safe. With these tips, you can tackle common electrical issues confidently and enjoy beautifully lit spaces year after year.
