
Christmas Lighting Made Easy
Essential Supplies
Supplies Used In Video
How to Properly Set a Spiral Anchor for Heavy-Duty Cables and Tie-Downs
Setting up outdoor equipment or securing heavy-duty cables requires strong anchors. One popular choice is the spiral anchor, known for its ease and strength. Whether you’re installing a tent, fixing a barrier, securing a fencing line, or anchoring decorations… knowing how to properly set a spiral anchor is essential. This guide shows you step-by-step how to do it right and explains how to use a turnbuckle to tighten your cable line effectively.
Understanding Spiral Anchors: Types, Uses, and Benefits
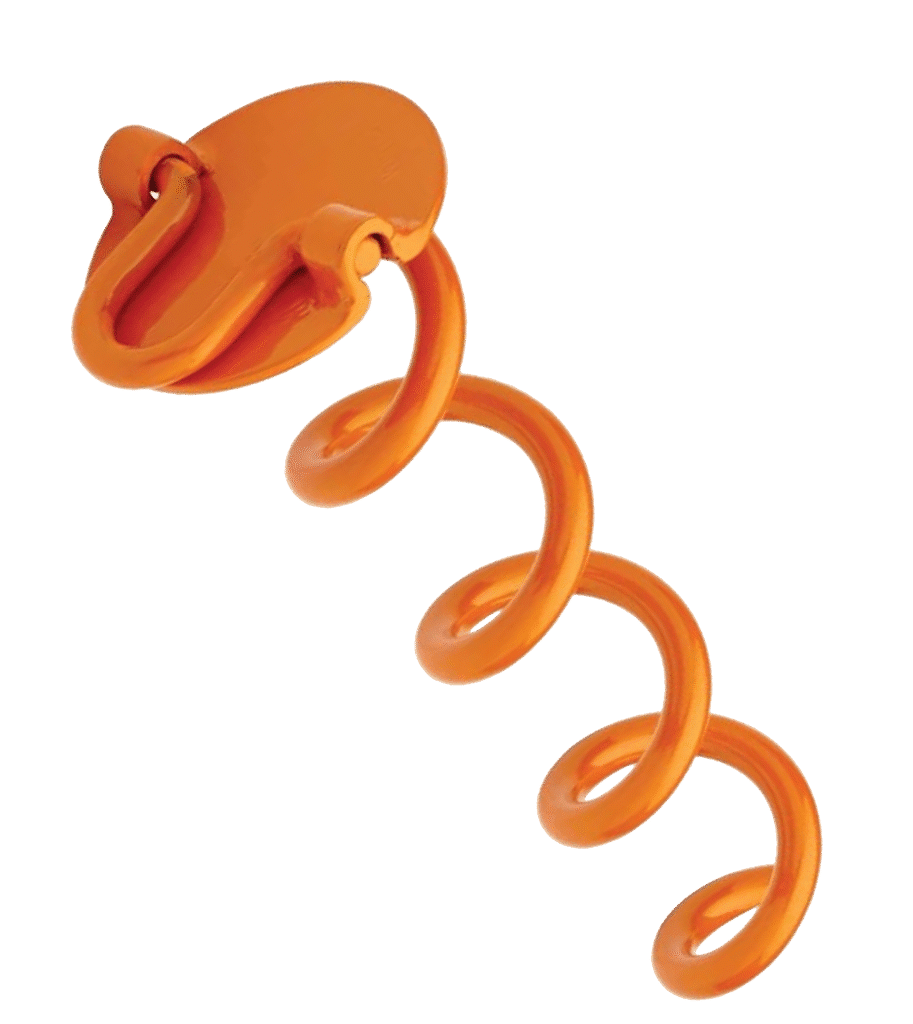
What Is a Spiral Anchor?
A spiral anchor is a metal device shaped like a screw, with a helix or spiral blade around a shaft. It’s designed to cut into the ground as you turn it, holding firmly once buried. These anchors usually measure around 10 to 12 inches long and are made from galvanized steel or other durable materials. They are simple, strong, and reusable.
When Should You Use a Spiral Anchor?
Spiral anchors shine in firm soil, like dry or sandy ground. If you need a quick, reliable way to secure lightweight or moderate loads, they work great. They’re perfect for outdoor events, camping setups, or temporary fences. But don’t use them in soft, wet soil during high winds—they might pull out more easily.
What Are the Benefits?
- Easy to install without fancy tools
- Reusable time and again
- Cost-effective for many outdoor projects
- Versatile across different terrain types
Preparing to Install the Spiral Anchor
Choosing the Right Anchor
Picking the correct anchor depends on what you plan to hold in place. Think about weight, ground type, and weather conditions. If you expect high winds or soft ground, consider a larger or different type of anchor. Always check the rated load capacity—this tells you how much weight it can safely hold.
Gathering the Needed Tools
You’ll need a few tools:
- Flathead screwdriver for added leverage
- Heavy gloves to protect your hands
Having these on hand makes the process smoother and safer.
Step-by-Step Guide to Setting a Spiral Anchor
Choosing the Best Spot
Look for a flat, open area free of rocks, roots, or debris. If your ground has stones or hard patches, you might need to adjust the anchor’s location or use extra tools.
Inserting the Anchor
Position the spiral part of the anchor into the soil. Apply even pressure as you turn it clockwise. It’s best to do this with your hand first, for better control and to feel when the anchor digs in.
Applying Pressure and Turning by Hand
Turn the anchor slowly while pressing down. You want it to bite into the ground firmly. If resistance increases, you’re on the right track. Keep turning until you feel significant resistance—that means it’s secure.
Using Leverage for Tough Spots
If you encounter rocks or dense soil, use a flathead screwdriver, small spade, or pry bar. Place the tool against the spiral and turn it to get more leverage. This helps the anchor penetrate difficult patches without too much effort.
Finalizing the Installation
Push the anchor in a bit more if needed, then give it a gentle tug to test stability. It shouldn’t wiggle or pull out easily. Once set, attach your cables or ropes.
Attaching and Tensioning Cables with Turnbuckles
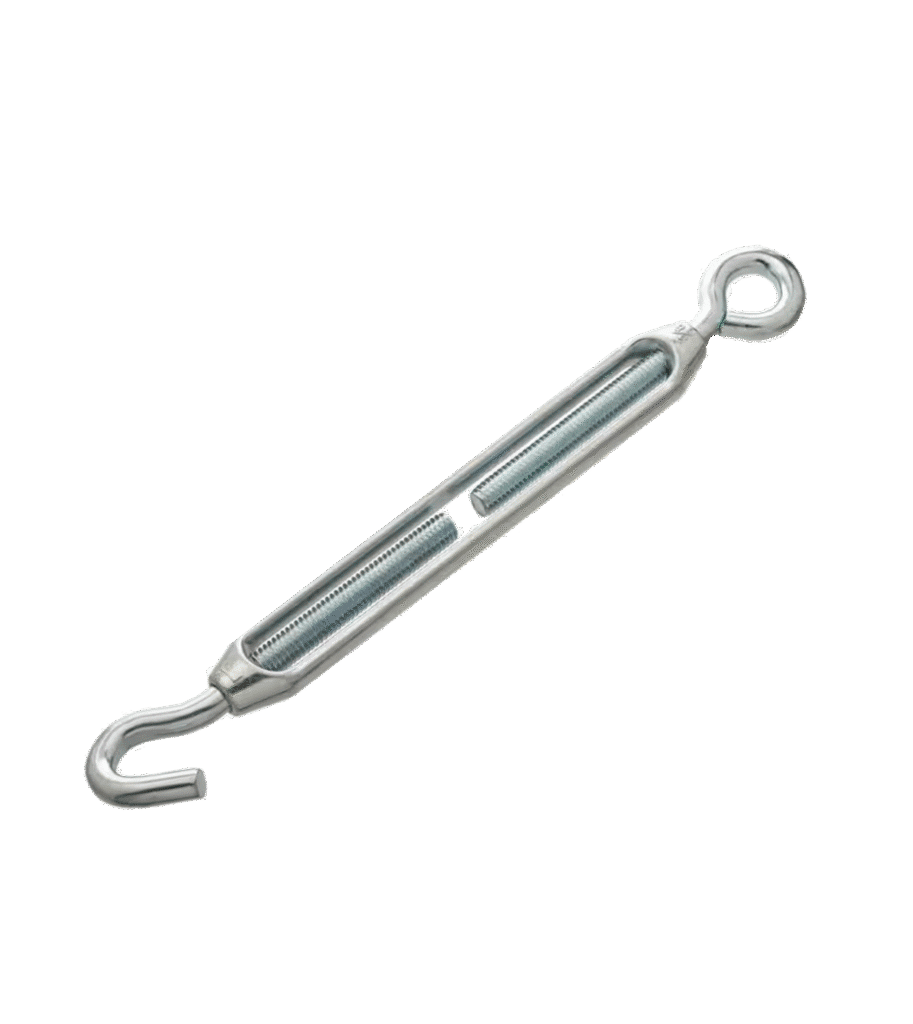
What Is a Turnbuckle?
A turnbuckle connects your cable lines to the anchor. It’s a metal device with threads that twist to tighten or loosen the tension. It’s the perfect tool to ensure your line stays tight and secure.
Installing the Turnbuckle
Attach the cable to the eye of the turnbuckle and connect it to the spiral anchor using hooks or rings. Make sure everything is tight but not over-stressed.
Adjusting Tension
Twist the turnbuckle by hand to tighten or loosen. For more leverage, use a flathead screwdriver or small wrench. Always check the tension along the cable after tightening—too tight can damage the anchor or the cable.
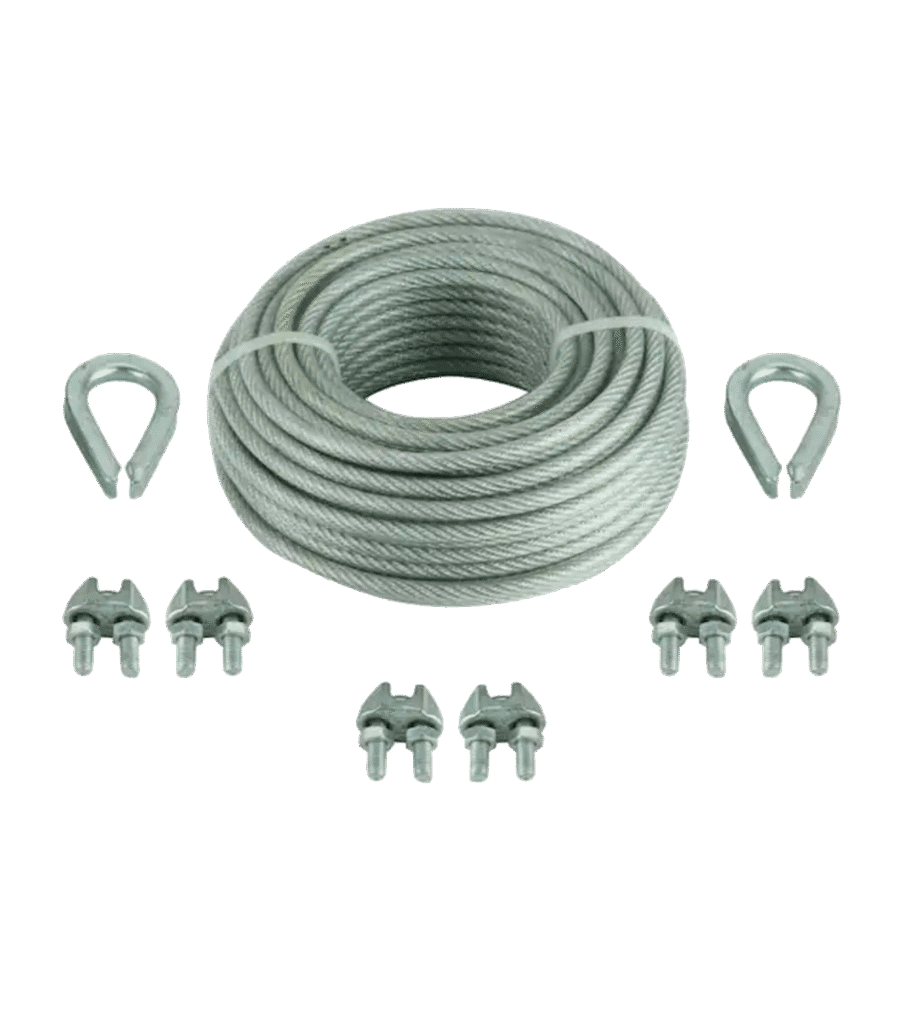
Securing the Cable Line
Use at least two or three thimbles for added security. This distributes the load evenly and prevents the line from slipping or sagging over time.
Best Practices and Tips for Optimal Results
Monitor Your Anchors
Check frequently after installation. Weather changes, wind, or ground shifting may cause slack or loosening. Adjust tension as needed to keep everything tight and stable.
Keep Safety in Mind
Wear gloves because metal edges can be sharp. Do not force anchors beyond their rated capacity—this could damage your equipment or cause injury.
When to Use Other Anchors
If your ground is very soft, wet, or exposed to high gusts, consider different anchoring options like concrete, weight based anchoring, or heavy-duty earth anchors. Spiral anchors work well in most conditions but aren’t foolproof against extreme weather.
Conclusion
Setting a spiral anchor for your decorations is simple but effective if you follow these steps. Always consider your ground conditions and load needs before installing. Use the right tools, apply steady pressure, and double-check stability. When combined with a secure turnbuckle, your setup will hold tight through storms and high winds. Proper anchoring means peace of mind and a safer outdoor environment—so get started and secure your outdoor projects confidently.
Need Christmas Light Supplies?
Shop the #1 Place
For Christmas Lights
Days Until Christmas!
Complete Guide to Replacing Socket with a Socket Wrench
Introduction
Understanding Sockets
Keeping your lights working properly depends on the condition of their sockets. Over time, these small parts can crack, break, or wear out from external impacts or everyday use. If you notice flickering bulbs, loose contacts, or visible damage, it may be time to fix or replace the socket. This guide walks you through the entire process, from inspection to final testing, so you can restore your lights safely and effectively.
